Completion
Posted by imdadmiah in Final Year Project, physical computing, University on December 12, 2012
We finally managed to complete our project and along the way encountered several problems however the final result was worth it and we found ourselves with a unique hacked mobile baby device. The project was long and we did put a lot of effort into it, some things did not go the way we thought they could so it would have been nice to have more time to correct these problems, all in all we managed to create a unique piece of device that attracted several fans upon its completion. Below is a few final pictures of our final sleepless day on the project.


Fitting it all together
Posted by imdadmiah in physical computing, University on December 11, 2012
Our next stage wass to fit it all together, this means placing the Arduino in the correct area, the green LED Pin to fit properly inside the drilled hole and so should the sound sensor at the front. However we had many problems doing this, there was not enough room for the sound sensor to fit and the green LED Pin kept coming out due to the constant moving around of the sensor. Therefore we decided to saw some area in the baby mobile that was not being used and was merely just an empty unneccesary piece of plastic. By doing this our sensor fitted well and we could now screw the device closed.
Connecting it all up
Posted by imdadmiah in physical computing, University on December 11, 2012
We have drilled the holes for the LED wires to go through the base, we have connected the positive and negative wires to ground and power. We tested our lights and success. We will be drilling 2 holes next, one for the green LED pin to show that the first timer has started and a hole for the sound sensor.

Attaching the LED lights to power
Posted by imdadmiah in physical computing, University on December 11, 2012
We are arriving near a conclusion soon, we will be attaching the LED lights to the power, so far we have managed to extend the wire but now will be further extending it down the baby mobile into the base, therefore we have to drill another two holes into the base and solder the wire to ground and power.

Using the Arduino without breadboard
Posted by imdadmiah in physical computing, University on December 11, 2012
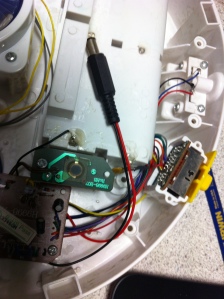
As we will be inserting the Arduino Uno into our breadboard very soon, we will need to attach the wires together and will need to make it work without the breadboard, Mohammod has drawn up a schematic and has figured out how to use the Arduino without the breadboard.


Drilling the holes for the LED’s
Posted by imdadmiah in physical computing, University on December 10, 2012
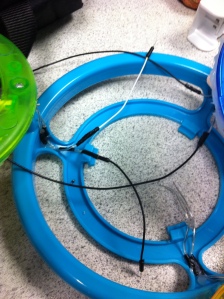
We will be drilling holes into the baby mobile part for the LED lights. These lights will be connected by 2 wires, positive and negative and fed through the newly drilled holes and then extended using a solder iron to more wire which will be fed into the main body of the baby mobile attached to power and ground.


Arduino power supply
Posted by imdadmiah in physical computing, University on December 9, 2012
We will be soldering wires to connect the Arduino to a battery and have cut off the battery piece with a wire cutter. We then soldered the ends of the wire onto to the power supply after testing it on each piece to see when we hit ground. The new Arduino connected which is powered through the baby mobile’s battery is shown below.
Painting the body
Posted by imdadmiah in physical computing, University on December 9, 2012
We have painted the body kit for the main baby mobile, we have painted over the blue hard foam with a black and white colour just to make it match a panda’s face. The photos below show the new body.


Soldering the wires
Posted by imdadmiah in physical computing, University on December 9, 2012
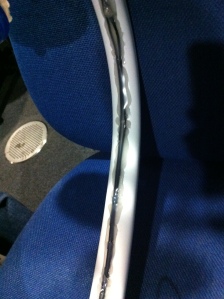
We had to solder the LED wires onto some extra piece of wire to lengthen the wires, soldering did take quite a bit of time but we managed to do quite a bit so far. We have stuck on black tape onto the soldered wire just to keep it in place, as well as for safety reasons. We used a hot glue gun to glue the wires onto the extension holder to keep it in place and to avoid loose wires.

Fixing up the LED lights
Posted by imdadmiah in physical computing, University on December 8, 2012
We have been working on the LED lights, I told you a few posts ago that we have trouble putting in the LED, what has been done today thanks to mohammod’s brilliance is purchase some play-doh and mould the shape of the mobile baby part attachment with the play-doh, putting the LED lights inside. We will then put hot glue inside the mould, and put the mould on top of the baby part attachment creating an excellent hot glue mould with the LED lights inside. So the output is a carefully neat hot glue mould on top of the baby mobile attachment. We then tested the LED Lights with a battery to our success.

